
Foreword
During recent security research discussions, I realized there were gaps in my understanding of Pointer Authentication Codes (PAC) on iOS. This article documents my journey to fill those gaps through hands-on experimentation.
This article takes a practical, learn-by-doing approach: we'll understand PAC theoretically, write code to observe PAC signatures, explore how to trigger PAC signing from userspace to understand the boundaries of what's possible on modern iOS.
Part 1: Understanding PAC
The Problem: Code Reuse Attacks
Before PAC, exploiting iOS was relatively straightforward once you found a memory corruption vulnerability. Attackers could:
- Overflow a buffer to overwrite return addresses on the stack
- Chain together existing code snippets (ROP/JOP)
- Execute arbitrary code without injecting new instructions
Legitimate code that already exists in the binary is reused by the attacker to change the normal flow. As it could be obscure for new comers. Let's explain what is ROP aka Return-Oriented Programming.
Example of basic Return-oriented Programming
Here's a simple example showing how ROP attacks work:
void process_input(char* user_data) {
    char buffer[64];
    strcpy(buffer, user_data);
}
In the listing above we can see that the user_data will be copied into buffer regardless of its size.
Let's draw a normal stack layout for that use case:
High addresses
┌─────────────────┐
│ Return Address  │ ← Saved from x30 (LR)
├─────────────────┤
│ Frame Pointer   │ ← Saved x29
├─────────────────┤
│ buffer[56..63]  │
│ ...             │
│ buffer[0..7]    │ ← strcpy writes here
└─────────────────┘
Low addresses
Now, if an attacker sends 100 bytes instead of 64, the extra bytes overflow and overwrite the return address. For instance we could have:
char evil_input[100];
memset(evil_input, 'A', 64);                     // We fill the buffer with random stuff
*(uint64_t*)(evil_input + 72) = gadget_address;  // Then we overwrite the return address
When the function returns with RET, instead of returning to the legitimate caller, the CPU jumps to gadget_address which is the existing code the attacker chose.
By chaining multiple gadgets (ROP chain), attackers execute arbitrary logic using only legitimate code snippets.
This is what PAC breaks.
The Solution: Pointer Authentication
ARMv8.3-A architecture introduced Pointer Authentication Codes (PAC), adding new CPU instructions to sign and verify pointers:
PAC instructions sign a pointer by adding a cryptographic signature to the unused upper bits of a 64-bit pointer. For example, PACIBSP stands for Pointer Authentication Code for Instruction address, using key B, with SP as context.
Note: we'll explain more about keys in one of the upcoming sections.
AUT instructions authenticate a pointer by verifying that the signature matches what's expected. For example, AUTIBSP means AUThenticate Instruction address, using key B, with SP as context. If verification fails, the pointer is "poisoned" (corrupted) and the program crashes.
Let's see how this protects against ROP. When a function enters, the compiler signs the return address (LR or x30) using the current context (typically the stack pointer):
function_entry:
    PACIBSP              ; Sign x30 with current SP as context
    STP fp, lr, [sp]     ; Save signed return address
    ...
    LDP fp, lr, [sp]     ; Restore signed return address
    AUTIBSP              ; Verify signature matches current SP
    RET                  ; Jump to return address
If an attacker overwrites the return address with a gadget address from elsewhere in memory, that address was either never signed at all (invalid PAC), or signed in a different context (different function, different SP). Either way, the signature won't match the current context. The AUTIBSP instruction detects this causing the program to crash instead of jumping to the attacker's gadget.
How PAC Works Under the Hood
At its core, PAC is a cryptographic formula:
PAC = f( Pointer , Key , Context )
Let's break down each component:
1. The Pointer
The address we want to protect. For example, a return address (x30/LR).
2. The Key
A key is a 128-bit secret stored in hardware registers that are inaccessible from userspace (EL0). There are 5 different keys: IA and IB for signing instruction pointers (code), DA and DB for signing data pointers, and GA for signing generic data. This is why you'll find many variants of PAC* instructions like PACIA, PACIB, PACDA...
How are these keys used?
Each key serves a specific purpose to prevent signature reuse. The letter suffix indicates which key type is used, and this distinction serves both security and performance.
The entire iOS/macOS system shares the same A key across all platform binaries like SpringBoard and kernel_task. Third party processes with the same Team ID (e.g., all apps signed by "Team Google") also share A keys.
This is critical for performance: iOS loads common libraries like libSystem.dylib and UIKit into a dyld shared cache in memory. These libraries contain millions of pointers, and they're signed once with the system A key. Every app can then verify these signatures without needing to re-sign them individually.
In contrast, B keys are unique to each process and generated randomly at creation time. A signature created with Process 1's B key cannot be verified by Process 2, which has its own randomly-generated B key. The only exception is when a process uses fork(), in which case the child inherits the parent's B key.
This dual-key design creates an elegant security model. System libraries use A keys for efficiency (shared and verified by all processes), while your app's private code uses B keys for isolation (signatures don't work in other processes). An attacker cannot reuse PAC signatures between different processes because they have different B keys, and cannot use a data pointer signature (D keys) as a code pointer (I keys) because the key types are distinct.
struct task {
    ...
    uint64_t rop_pid;  // Key for return addresses (IB key)
    uint64_t jop_pid;  // Key for jump addresses (IA key)
    ...
};
As said above, PAC keys are 128-bit secrets, but ARM64 registers are only 64-bit. So each key is split across two registers (Low and High) that are only accessible at EL1 and above:
Key IA (128 bits) = APIAKeyHi_EL1 (upper 64 bits) + APIAKeyLo_EL1 (lower 64 bits)
Key IB (128 bits) = APIBKeyHi_EL1 (upper 64 bits) + APIBKeyLo_EL1 (lower 64 bits)
Key DA (128 bits) = APDAKeyHi_EL1 (upper 64 bits) + APDAKeyLo_EL1 (lower 64 bits)
Key DB (128 bits) = APDBKeyHi_EL1 (upper 64 bits) + APDBKeyLo_EL1 (lower 64 bits)
Key GA (128 bits) = APGAKeyHi_EL1 (upper 64 bits) + APGAKeyLo_EL1 (lower 64 bits)
3. The Context (Salt)
A unique value that makes each signature different. Commonly used contexts include the SP (Stack Pointer) for return addresses, zero when no context is needed, or a custom value for specific use cases. Without context, an attacker could copy a valid PAC from one location to another (substitution attack).
Where Does the PAC Go?
ARM64 uses 64-bit addresses, but not all 64 bits are used for addressing. The upper bits are unused, which gives PAC a place to live:
Bit position:  63                    48                                   0
              ┌────────────────────────┬──────────────────────────────────┐
              │      PAC bits          │        Pointer bits              │
              │    (signature)         │      (actual address)            │
              └────────────────────────┴──────────────────────────────────┘
Example:
Original pointer:    0x 0000 0000 0000 1234
                        ^^^^             ^^^^
                       unused        real address

Signed pointer:      0x A7CF 0000 0000 1234
                        ^^^^             ^^^^
                        PAC         real address
Note: This assumes 48-bit addressing (common on current iOS/macOS). The actual split depends on
TCR_EL1.T0SZkernel configuration.
Part 2: Hands-On Experimentation
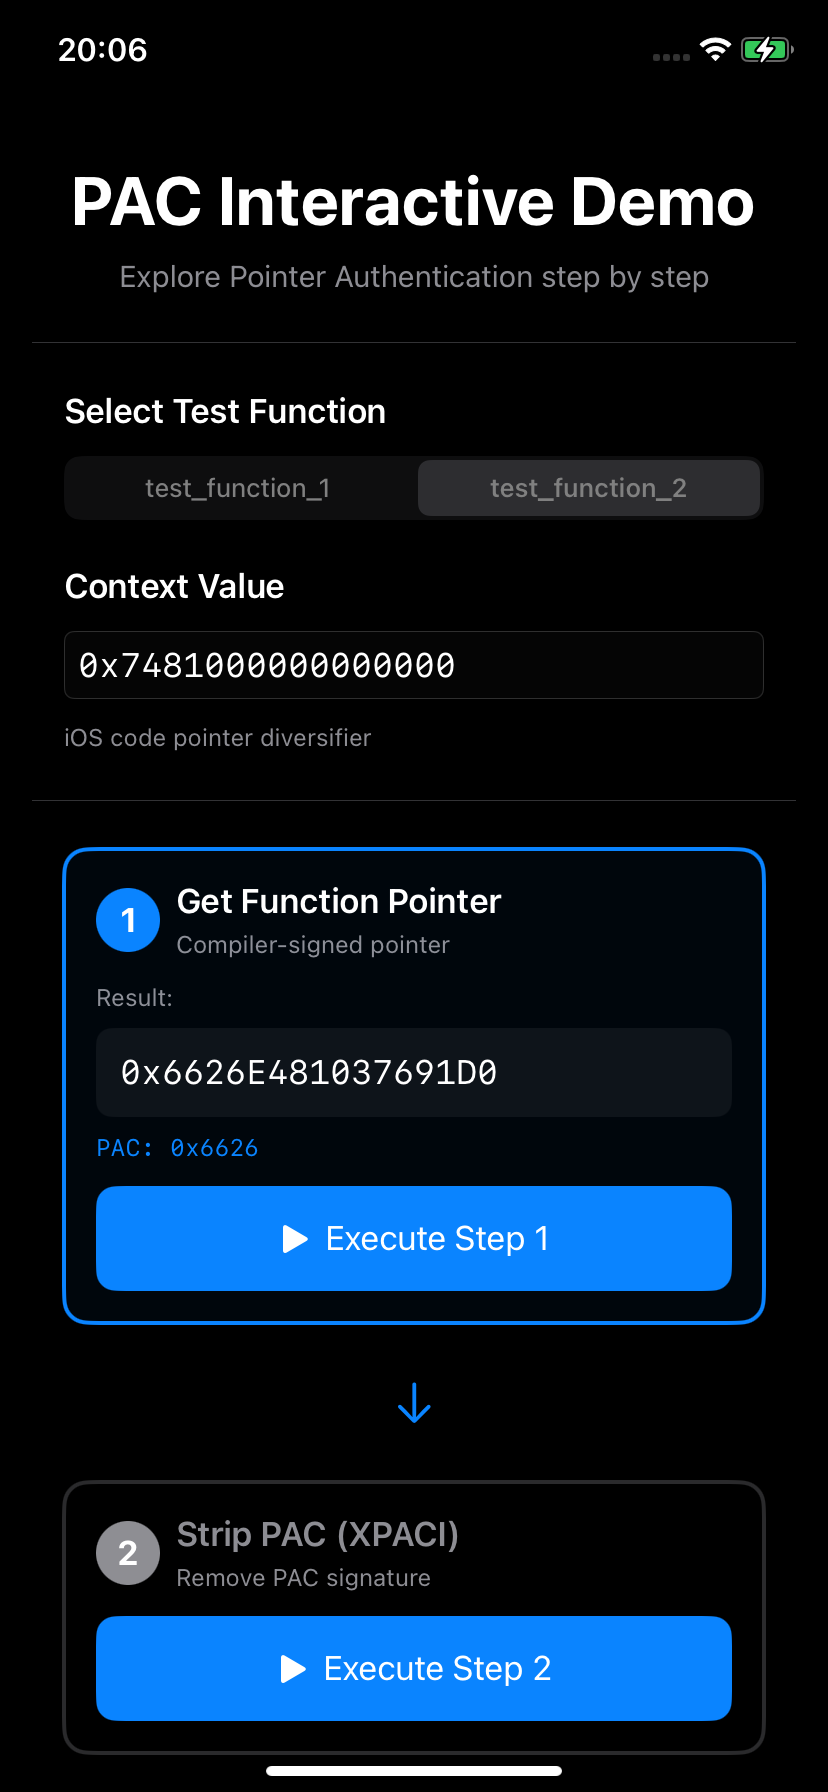
Let's experiment with PAC on iOS by building an interactive app that demonstrates each PAC operation step-by-step. The complete source code for this demo is available on GitHub, and you can clone the repository to run it on your own device (requires iPhone XS or newer with arm64e support).
Test environment: iPhone XR with A12 Bionic chip (PAC support), iOS 18.5, arm64e target in Xcode.
Step 1: Get Function Pointer
First, we'll observe how the compiler automatically signs function pointers when compiling for arm64e:
uint64_t pac_step1_get_function_pointer(void *func_ptr) {
    uint64_t addr = (uint64_t)func_ptr;
    printf("[STEP 1] Get function pointer\n");
    printf("  Address:  0x%016llx (compiler-signed)\n", addr);
    return addr;
}
What we observe:
- The compiler automatically adds PAC signatures to function pointers
- The upper 16 bits contain the PAC signature (e.g.,
0xa279) - This happens transparently when compiling for arm64e
Running on iPhone XR:
[STEP 1] Get function pointer
  Function: test_function_1
  Address:  0x7709030102e58470 (compiler-signed)
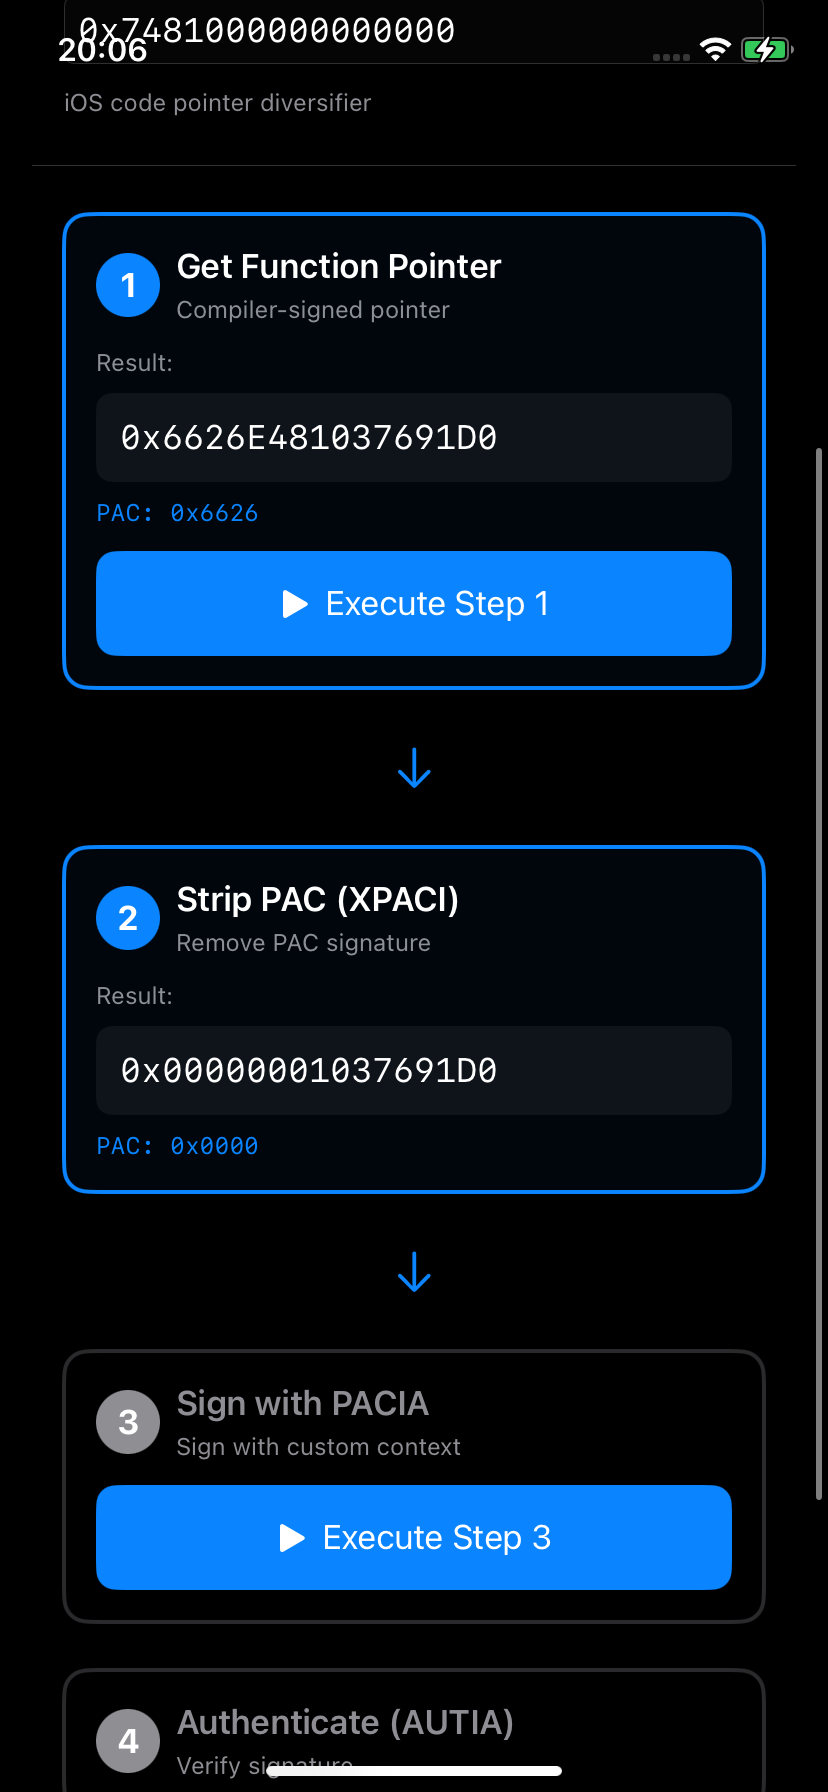
Step 2: Strip PAC with XPACI
Now we remove the PAC signature to get the canonical address using the XPACI instruction:
uint64_t pac_step2_strip_pac(uint64_t pointer) {
    uint64_t canonical;

    __asm__ volatile(
        "mov x16, %[ptr]\n"
        "xpaci x16\n"           // Strip PAC signature
        "mov %[result], x16\n"
        : [result] "=r" (canonical)
        : [ptr] "r" (pointer)
        : "x16"
    );

    uint64_t pac_bits = pointer ^ canonical;

    printf("\n[STEP 2] Strip PAC with XPACI\n");
    printf("  Original:  0x%016llx\n", pointer);
    printf("  Stripped:  0x%016llx\n", canonical);
    printf("  PAC bits:  0x%016llx (original ^ stripped)\n", pac_bits);
    printf("  ✓ PAC signature removed\n");

    return canonical;
}
What XPACI does:
- Takes a PAC-signed pointer
- Removes the signature bits
- Returns the canonical (clean) virtual address
- Does NOT verify the signature - just strips it
Output:
[STEP 2] Strip PAC with XPACI
  Original:  0x7709030102e58470
  Stripped:  0x0000000102e58470
  PAC bits:  0x7709030000000000 (original ^ stripped)
  ✓ PAC signature removed
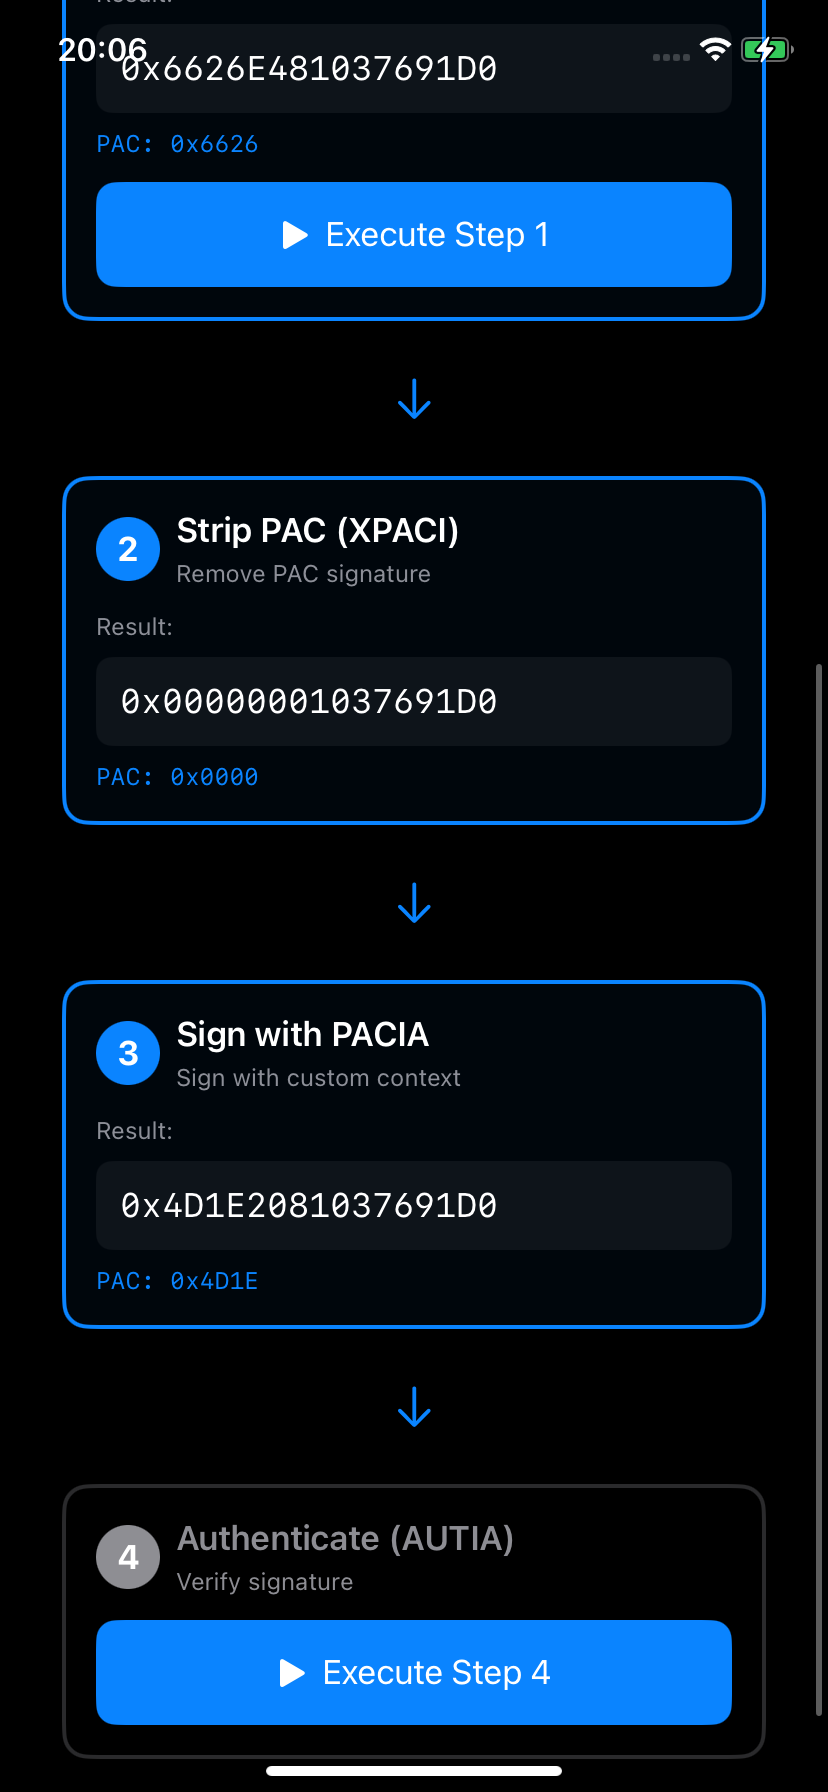
Step 3: Sign with PACIA and Custom Context
Now we sign the canonical address with our own context using the PACIA instruction:
uint64_t pac_step3_sign_pointer(uint64_t canonical_addr, uint64_t context) {
    uint64_t signed_ptr;

    __asm__ volatile(
        "mov x16, %[ptr]\n"
        "mov x17, %[ctx]\n"
        "pacia x16, x17\n"      // Sign with context
        "mov %[result], x16\n"
        : [result] "=r" (signed_ptr)
        : [ptr] "r" (canonical_addr),
          [ctx] "r" (context)
        : "x16", "x17"
    );

    uint64_t pac_bits = signed_ptr ^ canonical_addr;

    printf("\n[STEP 3] Sign with PACIA\n");
    printf("  Canonical: 0x%016llx\n", canonical_addr);
    printf("  Context:   0x%016llx\n", context);
    printf("  Signed:    0x%016llx\n", signed_ptr);
    printf("  PAC bits:  0x%016llx (signed ^ canonical)\n", pac_bits);
    printf("  ✓ Pointer signed with custom context\n");

    return signed_ptr;
}
What PACIA does:
- Takes canonical address in x16
- Takes context value in x17
- Uses secret hardware key IA
- Computes:
PAC = f(address, key_IA, context) - Returns signed pointer with PAC in upper bits
About the context 0x7481000000000000:
This is iOS's static diversifier that I found in Predator implant. We'll use it for the rest of this tutorial.
Output:
[STEP 3] Sign with PACIA
  Canonical: 0x0000000102e58470
  Context:   0x7481000000000000
  Signed:    0x143cfb0102e58470
  PAC bits:  0x143cfb0000000000 (signed ^ canonical)
  ✓ Pointer signed with custom context
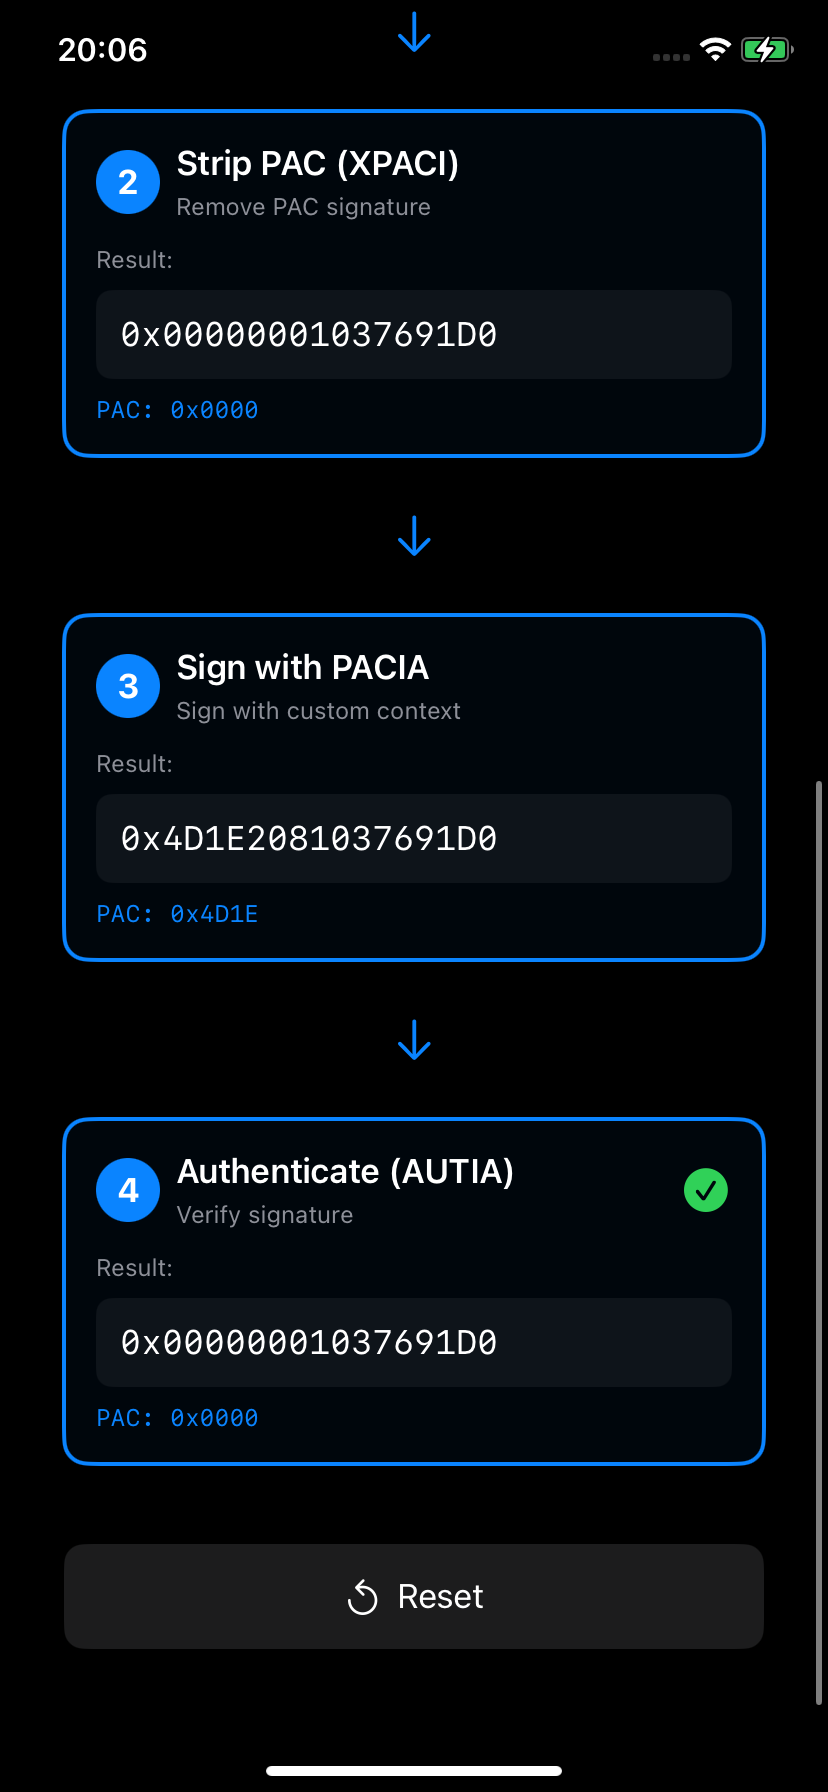
Step 4: Authenticate with AUTIA
Finally, we verify the signature and recover the canonical address using the AUTIA instruction:
uint64_t pac_step4_authenticate(uint64_t signed_ptr, uint64_t context) {
    uint64_t authenticated;

    __asm__ volatile(
        "mov x16, %[ptr]\n"
        "mov x17, %[ctx]\n"
        "autia x16, x17\n"      // Authenticate
        "mov %[result], x16\n"
        : [result] "=r" (authenticated)
        : [ptr] "r" (signed_ptr),
          [ctx] "r" (context)
        : "x16", "x17"
    );

    printf("\n[STEP 4] Authenticate with AUTIA\n");
    printf("  Signed:        0x%016llx\n", signed_ptr);
    printf("  Context:       0x%016llx\n", context);
    printf("  Authenticated: 0x%016llx\n", authenticated);

    return authenticated;
}
What AUTIA does:
- Takes signed pointer in x16
- Takes context in x17
- Recomputes:
PAC' = f(stripped_address, key_IA, context) - Compares
PAC'with the PAC in the pointer
Success case (correct context):
[STEP 4] Authenticate with AUTIA
  Signed:        0x143cfb0102e58470
  Context:       0x7481000000000000
  Authenticated: 0x0000000102e58470
Conclusion
Through hands-on experimentation with both code and our interactive app, we've learned that PAC provides strong cryptographic protection for pointers. The keys are stored in hardware registers inaccessible from userspace, making it impossible to forge signatures without access to those keys. The CPU can execute PAC instructions for us, but we cannot read the keys to predict or compute signatures ourselves.
Whether you're experimenting with inline assembly or using the visual demo app, understanding PAC helps us appreciate the sophisticated security mechanisms in modern iOS and how they raise the bar for exploitation. The interactive nature of the demo makes these concepts tangible and easier to grasp than reading code alone.
References
- For the ARMv8.3-A Pointer Authentication Extension, see the ARM Architecture Reference Manual.
- The removed PAC.md from XNU source code
- Stefan Esser's iOS internal - PAC video
- For the interactive PAC demo app source code, see the project repository on GitHub.
This article is for educational and security research purposes. Understanding these techniques helps build better defenses.